AI Photo Editing for Real Estate Listings: Complete Guide 2026
Transform your real estate photography with AI. Learn how agents and photographers use AI tools to create stunning property photos that sell faster. Professional tips included.
In the competitive world of real estate, first impressions are everything. Properties with professional-quality photos receive 118% more online views and sell 32% faster than those with amateur images, according to recent industry studies. Yet traditional professional photography and editing can cost hundreds of dollars per listing and take days to complete.
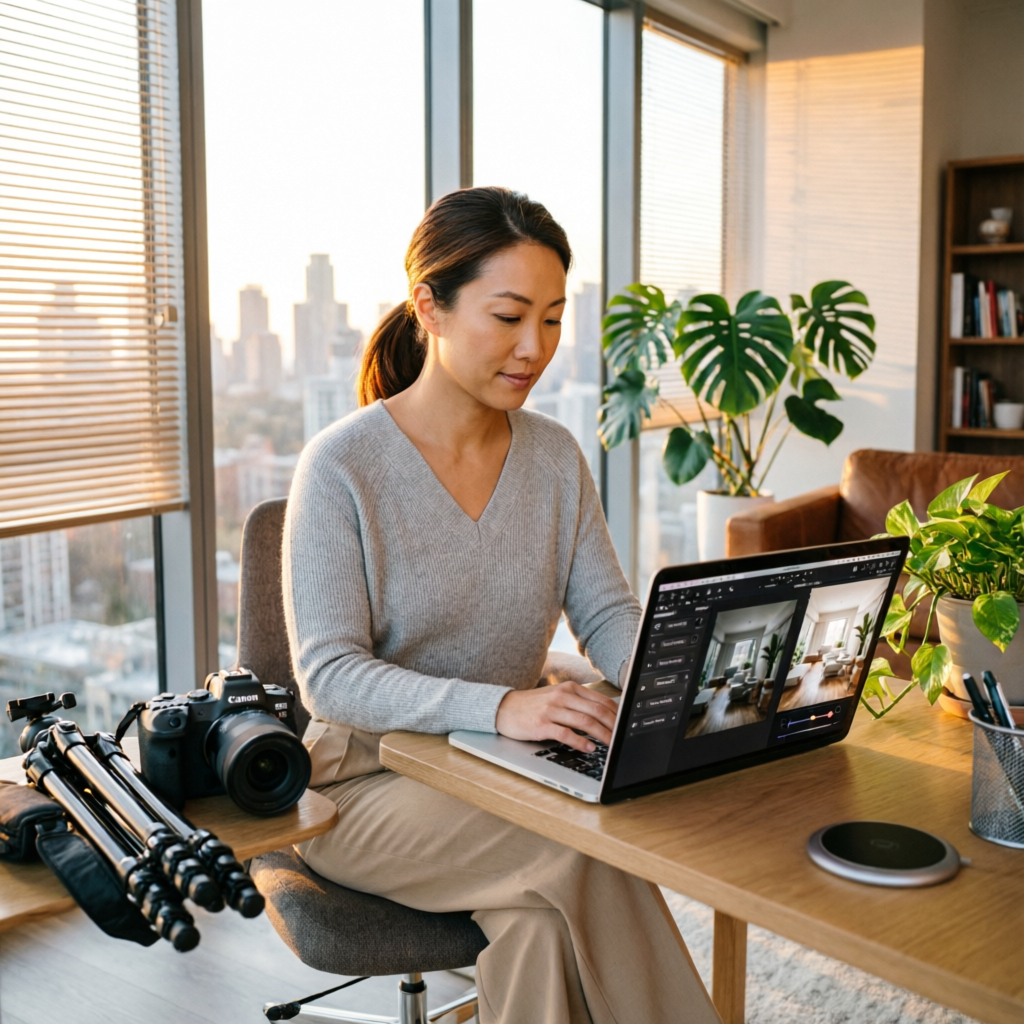
AI photo editing has revolutionized real estate photography in 2026, enabling agents and photographers to produce magazine-quality listing photos in minutes rather than hours. Whether you're a real estate agent handling your own photography or a professional real estate photographer looking to streamline your workflow, AI tools can dramatically improve your results while reducing costs and turnaround time.
This comprehensive guide reveals exactly how successful real estate professionals are leveraging AI photo editing to create compelling property listings that attract more buyers and close faster. From sky replacement to virtual staging, you'll discover practical techniques you can implement immediately.
Why Real Estate Photography Demands Professional Quality
The Impact of Visual Presentation
Real estate is an intensely visual business where photos make or break your listing success:
Buyer Behavior Statistics:
- 87% of home buyers find photos the most useful feature on listing websites
- Listings with high-quality photos receive 61% more online interest
- Properties with professional photos sell for $3,400 to $11,200 more on average
- Buyers spend 60% more time viewing listings with superior images
The Professional Photography Challenge:
- Cost: Professional photography typically costs $150-$500 per property
- Time: Scheduling photographers, waiting for ideal conditions, editing delays
- Consistency: Variable quality across different photographers and lighting conditions
- Revisions: Difficult and expensive to adjust photos after the initial shoot
How AI Changes the Game: Modern AI tools enable real estate professionals to achieve professional results without the traditional costs and delays. You can shoot properties yourself with a decent camera or smartphone, then use AI to handle:
- Lighting correction and HDR enhancement
- Sky replacement and weather improvement
- Perspective correction and room straightening
- Virtual staging and furniture placement
- Color grading and mood enhancement
Essential AI Editing Tasks for Real Estate Photos
1. Sky Replacement and Weather Enhancement
Nothing kills a property listing faster than dull gray skies or gloomy weather. AI sky replacement has become the number one technique used by successful real estate photographers.
Why It Matters:
- Homes photographed under blue skies receive 31% more interest
- Buyers subconsciously associate good weather with positive home feelings
- Consistent sky quality across all listing photos creates professional cohesion
AI Tools for Sky Replacement:
- AImage: One-click sky replacement with regional weather-appropriate options
- Luminar Neo: Real Estate Sky AI with property-specific sky library
- Photoroom: Automatic sky detection and smart replacement
Best Practices:
- Choose skies that match your local climate (don't use tropical skies for Vermont properties)
- Maintain realistic lighting consistency between sky and property
- Keep some clouds for natural appearance—completely clear skies look artificial
- Adjust reflections in windows to match the new sky
Technical Tip: When replacing skies, AI tools analyze the original lighting direction and color temperature, automatically adjusting the property illumination to match the new sky. This creates realistic results that traditional sky swapping could never achieve.
2. HDR Enhancement and Interior Lighting
Real estate interiors present unique lighting challenges—bright windows create harsh exposure contrasts, making rooms appear darker than they actually are. HDR (High Dynamic Range) processing solves this problem.
The Problem: Standard cameras can't capture the full range of brightness that our eyes see. Photos of interior rooms often show either blown-out windows or dark room details—never both properly exposed.
AI HDR Solutions: Modern AI HDR tools analyze multiple exposure levels in a single photo, intelligently blending them to create natural-looking results with perfect exposure throughout.
Tools and Techniques:
- AImage HDR Enhancement: Single-photo HDR processing using AI exposure prediction
- Aurora HDR: Real estate-specific presets with window recovery
- Topaz Photo AI: Intelligent exposure blending with detail enhancement
Professional HDR Workflow:
- Shoot with adequate ambient lighting (open curtains, turn on all lights)
- Take a single well-exposed shot focusing on room details
- Apply AI HDR enhancement to recover window views
- Fine-tune brightness and contrast for natural appearance
- Ensure walls remain white/neutral (avoid color casts)
Common Mistakes to Avoid:
- Over-processing that creates an unnatural "HDR look"
- Excessive saturation that makes colors appear fake
- Halos around window edges from aggressive processing
- Inconsistent lighting across room series
3. Perspective Correction and Room Straightening
Tilted walls and distorted rooms instantly scream "amateur photography." Professional real estate photos feature perfectly straight vertical lines and natural room proportions.
Why Perspective Matters:
- Tilted walls make rooms appear unstable and poorly constructed
- Wide-angle distortion makes spaces look warped and unnatural
- Proper perspective correction increases perceived room size by up to 15%
AI Perspective Tools:
- AImage Perspective Correction: Automatic architectural line detection
- DxO ViewPoint: AI-powered volume deformation for natural corrections
- Photoshop Camera Raw: AI-guided geometry adjustment
Correction Workflow:
- Vertical Line Straightening: Correct any tilted walls or door frames
- Horizontal Alignment: Level floor lines and ceiling edges
- Wide-Angle Distortion Fix: Remove barrel distortion from wide lenses
- Volume Deformation: Restore natural room proportions
Pro Technique: AI perspective tools now analyze room geometry to determine the correct vanishing points automatically. This creates mathematically accurate corrections that look completely natural—unlike manual adjustments that often leave subtle distortions.
4. Virtual Staging and Furniture Placement
Empty rooms are difficult for buyers to visualize. Virtual staging has become one of the most powerful tools in real estate marketing, with virtually staged homes selling 73% faster than vacant properties.
The Business Case for Virtual Staging:
- Traditional Staging Cost: $2,000-$6,000 per property for 1-3 months
- AI Virtual Staging Cost: $25-$50 per room, instant results
- ROI: Staged homes (virtual or physical) sell for 5-7% above asking price on average
AI Virtual Staging Tools:
- Apply Design: Full room furnishing with multiple style options
- BoxBrownie: Real estate-specific virtual staging with quick turnaround
- Virtual Staging AI: One-click furniture placement for empty rooms
Staging Strategy by Room Type:
Living Rooms:
- Modern contemporary furniture for urban properties
- Traditional comfortable seating for suburban family homes
- Minimalist Scandinavian for smaller spaces
Bedrooms:
- Neutral bedding and simple furniture
- Size-appropriate beds (don't overwhelm small rooms)
- Tasteful artwork and minimal decor
Kitchens:
- Don't stage kitchens—show clean countertops and appliances clearly
- Add a simple fruit bowl or coffee maker for lived-in feel
- Keep focus on cabinetry and fixtures
Outdoor Spaces:
- Patio furniture for decks and patios
- Landscaping enhancement (lawn greening, flower addition)
- Remove pool covers and seasonal equipment
Virtual Staging Best Practices:
- Always disclose that photos are virtually staged
- Stage consistently across the entire property
- Match furniture scale to room size accurately
- Choose styles appropriate for the neighborhood and price point
- Provide both staged and unstaged versions when possible
5. Color Grading and Mood Enhancement
Professional real estate photos have a consistent, appealing color palette that makes properties look warm, inviting, and move-in ready.
Color Psychology in Real Estate:
- Warm tones: Create feelings of comfort and home
- Cool tones: Convey modernity and cleanliness
- Neutral balance: Appeals to the broadest buyer demographic
- Vibrant saturation: Attracts attention in listing thumbnails
AI Color Grading Tools:
- AImage Auto Color: Analyzes property type and applies appropriate grading
- Lightroom AI Presets: Real estate-specific color profiles
- DxO PhotoLab: Smart color balance with property recognition
Professional Color Grading Workflow:
- White Balance Correction: Ensure walls appear white/cream, not yellow or blue
- Saturation Enhancement: Boost colors 15-20% without looking artificial
- Contrast Adjustment: Create depth while maintaining detail
- Shadow/Highlight Balance: Reveal details in both bright and dark areas
- Consistency Check: Ensure all photos in a listing match color-wise
Room-Specific Color Guidelines:
- Kitchens: Crisp, clean whites with slight warm tone
- Bathrooms: Bright, hygienic appearance with blue-white balance
- Bedrooms: Warm, inviting tones promoting relaxation
- Living Areas: Balanced natural tones with depth
- Exteriors: Rich colors with vibrant landscaping
6. Item Removal and Clutter Cleanup
Even well-maintained properties often have visual distractions that detract from the property itself. AI object removal has become essential for creating clean, professional listing photos.
Common Items to Remove:
- Personal Items: Family photos, children's toys, personal collections
- Utility Objects: Trash cans, cleaning supplies, pet bowls
- Temporary Items: Moving boxes, seasonal decorations, cords and cables
- Exterior Clutter: Trash bins, parked cars, seasonal equipment
- Reflections: Photographer in mirrors, camera tripods in windows
AI Object Removal Tools:
- AImage Object Remover: Select and delete unwanted objects instantly
- Cleanup.pictures: One-click removal of common distractions
- Photoshop Generative Fill: Context-aware object removal with AI reconstruction
Removal Best Practices:
- Remove distracting objects but don't fundamentally change the property
- Maintain realistic shadows and lighting after removal
- Clean up minor imperfections (scuffs, stains) but don't hide major defects
- Remove vehicles from driveways to showcase parking space
- Clean up lawns (remove fallen leaves, branches) but keep realistic
Ethical Considerations: Always maintain honesty in real estate photography. Remove distractions and enhance presentation, but never:
- Hide structural defects or damage
- Misrepresent room sizes or features
- Add features that don't exist
- Fundamentally alter property characteristics
Complete AI Real Estate Photography Workflow
Here's the step-by-step workflow used by top real estate photographers in 2026:
Pre-Shoot Preparation
1. Property Walkthrough (15 minutes):
- Open all curtains and blinds for maximum natural light
- Turn on all lights throughout the property
- Remove obvious clutter and personal items
- Stage rooms minimally (arrange furniture attractively)
- Clean mirrors, windows, and reflective surfaces
2. Equipment Check:
- DSLR, mirrorless camera, or modern smartphone (iPhone 15 Pro or equivalent)
- Wide-angle lens (16-35mm) or smartphone ultra-wide mode
- Tripod for stability and consistent height
- Backup battery and storage cards
Shooting Process
3. Systematic Room Coverage (30-45 minutes per property):
- Shoot from doorways and corners to show maximum room space
- Capture 3-5 angles per room (wide establishing shot plus detail shots)
- Include key features: fireplaces, built-ins, updated fixtures
- Photograph from human eye height (4.5-5 feet) for natural perspective
- Bracket exposures if your AI tools require it (most modern AI works with single shots)
4. Exterior Photography:
- Shoot during golden hour (1 hour after sunrise or before sunset) when possible
- Capture front facade straight-on and from appealing angles
- Include contextual shots (neighborhood, street view, landscaping)
- Photograph outdoor living spaces, decks, patios, pools
AI Post-Processing
5. Initial Culling and Selection (10 minutes):
- Review all shots and select the best 15-25 images per property
- Ensure coverage of all major rooms and features
- Remove duplicates and obviously flawed shots
6. AI Enhancement Sequence (5-10 minutes per photo):
Stage 1: Foundational Corrections
- Perspective correction: Straighten vertical and horizontal lines
- Exposure adjustment: Apply AI HDR or exposure balance
- White balance: Correct color temperature to neutral
Stage 2: Sky and Weather
- Sky replacement: Add appealing skies to exterior and window views
- Lighting consistency: Match interior lighting to sky changes
Stage 3: Color and Mood
- Color grading: Apply professional real estate color profile
- Saturation enhancement: Boost colors naturally
- Contrast adjustment: Create depth and dimension
Stage 4: Cleanup and Polish
- Object removal: Delete distractions, clutter, personal items
- Detail enhancement: Sharpen architectural features
- Final quality check: Review for natural appearance and consistency
7. Virtual Staging (if property is vacant):
- Select empty rooms to stage (living room, master bedroom, dining room)
- Choose appropriate furniture styles for property and neighborhood
- Apply AI virtual staging
- Generate both staged and unstaged versions
Quality Control
8. Consistency Review (5 minutes):
- Review entire photo set for consistent color and style
- Check that all images work together cohesively
- Ensure no over-processing or unnatural effects
- Verify technical quality (sharpness, exposure, color)
9. Final Delivery:
- Export at appropriate resolution (2000-4000 pixels wide for web)
- Name files systematically (address_room_sequence.jpg)
- Provide both full resolution and web-optimized versions
- Include metadata (date, photographer, property address)
AI Tools Comparison for Real Estate Photography
Best Overall: AImage Real Estate Suite
Key Features:
- One-click real estate photo enhancement
- Automatic sky replacement with weather-appropriate options
- HDR processing optimized for interior/exterior contrast
- Virtual staging with real estate-specific furniture
- Batch processing for entire listing sets
Pricing: Free basic processing, $29/month Pro for unlimited edits Best For: Real estate agents handling their own photography
Best for Professional Photographers: Luminar Neo
Key Features:
- Advanced sky AI with property-specific options
- Professional color grading presets for real estate
- Focus stacking for maximum sharpness
- Advanced perspective correction tools
- Standalone and plugin versions
Pricing: $99/year subscription or $199 one-time Best For: Professional real estate photographers handling high volumes
Best Virtual Staging: Apply Design
Key Features:
- Extensive furniture and decor library
- Multiple style options (modern, traditional, luxury)
- Room type recognition for appropriate staging
- Quick turnaround (usually under 24 hours)
- Both staged and unstaged versions provided
Pricing: $29-$39 per room Best For: Vacant properties needing professional staging
Best Budget Option: Photoroom
Key Features:
- Simple object removal and background editing
- Basic sky replacement
- One-click enhancement presets
- Mobile app for on-site editing
- Free tier available
Pricing: Free with watermark, $10/month Pro Best For: Beginner agents with tight budgets
Professional Photographer's Tech Stack
Most successful real estate photographers use a combination of tools:
Primary Workflow:
- Lightroom Classic: Initial import, culling, basic adjustments
- Luminar Neo or AImage: Sky replacement, HDR, color grading
- Photoshop: Advanced retouching and final polish
- Apply Design or BoxBrownie: Virtual staging when needed
Total Software Cost: Approximately $40-60/month for professional suite
Real-World Success Stories
Case Study 1: Reducing Photography Costs by 70%
Agent: Sarah Mitchell, boutique agency in Phoenix, Arizona
Challenge: Spending $300-500 per listing on professional photography with 3-4 day turnaround
Solution:
- Purchased iPhone 15 Pro and basic tripod ($1,100)
- Subscribed to AImage Pro and Apply Design ($60/month)
- Learned AI photography workflow (8 hours training)
Results:
- Photography cost reduced to $30-50 per listing
- Same-day photo delivery to clients
- Quality indistinguishable from previous professional work
- First-year savings: $8,400 on 25 listings
Quote: "Clients can't tell the difference between my AI-edited photos and the professional photographer we used before. The best part is I can shoot and deliver photos the same day I list a property."
Case Study 2: Virtual Staging Transforms Vacant Property Sales
Photographer: Marcus Johnson, real estate photography specialist in Chicago
Challenge: Vacant properties sitting on market 40% longer than furnished homes
Solution:
- Integrated virtual staging into all vacant property packages
- Offered both staged and unstaged versions to clients
- Automated workflow delivering staged photos within 24 hours
Results:
- Virtually staged properties selling 28 days faster on average
- 45% more online inquiries on staged listings
- Increased photographer's package prices by 30%
- Client retention rate increased from 65% to 89%
Quote: "Virtual staging has become my most requested add-on service. Clients see the direct impact on buyer interest and sales speed, so they're willing to invest in it for every vacant property."
Case Study 3: High-Volume Agent Automates Entire Workflow
Team: Riverside Realty Group, 12-agent team in Portland, Oregon
Challenge: Managing photography for 180+ listings per year with inconsistent quality
Solution:
- Equipped all agents with iPhone 15 Pro and mobile tripods
- Implemented standardized AI editing workflow using Photoroom and Luminar Neo
- Created team presets for consistent brand appearance
- Trained all agents on basic photography and AI editing
Results:
- Zero external photography costs (previous cost: $48,000/year)
- 24-hour listing turnaround (down from 5-7 days)
- Consistent professional quality across all listings
- Team competitive advantage in fast-moving markets
Quote: "Our in-house AI photography system has become a major differentiator. We can list properties faster than any competitor in our market, and our photos look just as professional as theirs."
Common Mistakes and How to Avoid Them
Mistake 1: Over-Processing Photos
The Problem: Excessive AI enhancement creates unrealistic, cartoonish images that repel buyers and damage credibility.
Warning Signs:
- Unnaturally saturated colors
- Obvious halos around edges
- Plastic-looking textures
- Impossible lighting scenarios
- Over-sharpened details
Solution:
- Use AI tools at 60-80% strength rather than 100%
- Compare before/after carefully—if it looks dramatically different, dial it back
- Show photos to colleagues for honest feedback
- Remember: enhancement should be invisible
Mistake 2: Inconsistent Editing Across Listing
The Problem: Each photo edited differently creates a disjointed, unprofessional listing presentation.
Solution:
- Edit all photos from one listing in a single session
- Apply the same AI presets or settings to all images
- Check final gallery for consistent color, contrast, and style
- Use batch processing when possible for perfect consistency
Mistake 3: Ignoring Lighting Fundamentals
The Problem: Relying on AI to fix poorly lit photos results in mediocre results. Garbage in, garbage out.
Solution:
- Always turn on all lights when photographing interiors
- Open curtains and blinds for natural light
- Shoot during daylight hours when possible
- Use AI to enhance good lighting, not rescue bad lighting
Mistake 4: Not Disclosing Virtual Staging
The Problem: Failing to disclose virtual staging can lead to buyer disappointment and legal issues.
Solution:
- Always label virtually staged photos in listing descriptions
- Include "virtually staged" watermark on staged images
- Provide both staged and unstaged versions when possible
- Follow local real estate regulations regarding photo disclosure
Mistake 5: Hiding Property Defects
The Problem: Using AI to hide structural issues or defects is unethical and potentially illegal.
Solution:
- Enhance presentation, but never misrepresent condition
- Remove clutter, not defects
- Disclose material issues in listing descriptions
- Remember that in-person showings will reveal reality
Future Trends in AI Real Estate Photography
1. Real-Time On-Site Editing
What's Coming: AI editing apps that process photos in real-time as you shoot, allowing agents to deliver finished photos before they leave the property.
Impact: Same-day listing turnaround becomes the industry standard.
2. AI-Generated 3D Virtual Tours
What's Coming: AI systems that convert standard 2D photos into fully navigable 3D virtual tours without special equipment.
Impact: Every listing includes immersive virtual tours at minimal additional cost.
3. Predictive Buyer Preference Optimization
What's Coming: AI that analyzes buyer demographics and preferences to automatically optimize photos for maximum appeal to target audiences.
Impact: Photos automatically tailored to attract the most qualified buyers for each property.
4. Automated Property Description Generation
What's Coming: AI systems that analyze photos and generate compelling listing descriptions highlighting key features shown in images.
Impact: Complete listing packages (photos + descriptions) created in minutes rather than hours.
5. AI Quality Control and Compliance Checking
What's Coming: Automated systems that check photos for quality standards, proper disclosure, and regulation compliance before publishing.
Impact: Reduced errors and liability risks in listing presentations.
Getting Started: Your AI Real Estate Photography Action Plan
Week 1: Foundation Building
Day 1-2: Equipment Assessment
- Evaluate your current camera or smartphone
- If upgrading, choose between professional camera or iPhone 15 Pro/Samsung Galaxy S24
- Purchase basic tripod and optional remote trigger
Day 3-4: Software Selection
- Sign up for free trials of AImage, Luminar Neo, and Photoroom
- Test each tool with 5-10 sample photos
- Choose primary editing platform based on your needs and budget
Day 5-7: Learning and Practice
- Watch tutorial videos for your chosen AI tools
- Practice with 2-3 properties (use your own home, friends' homes, or model homes)
- Develop your personal workflow and timing
Week 2: Workflow Refinement
Day 8-10: Process Optimization
- Create custom presets or settings for consistent editing
- Develop shot list template for systematic property coverage
- Time yourself shooting and editing practice properties
Day 11-12: Quality Benchmarking
- Compare your AI-edited photos to professional photographer work in your market
- Get feedback from colleagues or clients on your test shots
- Refine editing approach based on feedback
Day 13-14: First Live Listings
- Apply your AI photography workflow to 1-2 actual listings
- Monitor buyer response and engagement metrics
- Gather client feedback
Month 1+: Scaling and Mastery
Weeks 3-4: Volume Building
- Photograph and edit 5-10 properties per week
- Refine workflow to reduce editing time
- Track time and cost savings versus previous methods
Month 2: Advanced Techniques
- Add virtual staging to service offerings
- Experiment with advanced AI features (sky replacement, item removal)
- Develop signature style that differentiates your listings
Month 3+: Business Integration
- Train team members on AI photography workflow
- Integrate AI photography into your marketing and brand
- Consider offering photography services to other agents
Conclusion: Your Competitive Advantage
AI photo editing has democratized professional-quality real estate photography, giving individual agents and small photography businesses the tools to compete with large, well-funded operations. The agents and photographers winning in 2026 are those who have embraced AI technology to deliver exceptional results faster and more affordably than ever before.
The barrier to entry has never been lower—you don't need a $5,000 camera, years of Photoshop training, or a degree in photography. You need a modern smartphone, $30-60 in monthly software subscriptions, and the willingness to learn a new workflow.
Start small, practice consistently, and within 30 days you'll be producing listing photos that attract more buyers, generate more interest, and help properties sell faster. Your clients will notice the difference, buyers will respond, and you'll wonder how you ever managed without AI in your real estate toolkit.
Related Articles:
- AI Photo Editing for Social Media Content Creators: Complete 2026 Guide
- AI Photo Restoration Techniques: Complete Guide 2026
- AI Image Upscaling and Enhancement: Complete Guide 2026
Recommended External Tools:
Ready to transform your real estate photography?
Try AImage for Free →Ready to try it yourself?
Try AImage for Free →