AI Photo Restoration Techniques: Complete Guide 2026 - From Basics to Advanced
Master AI photo restoration with our comprehensive 2026 guide. Learn automatic and manual techniques, best tools, and expert tips for restoring old, damaged photos.
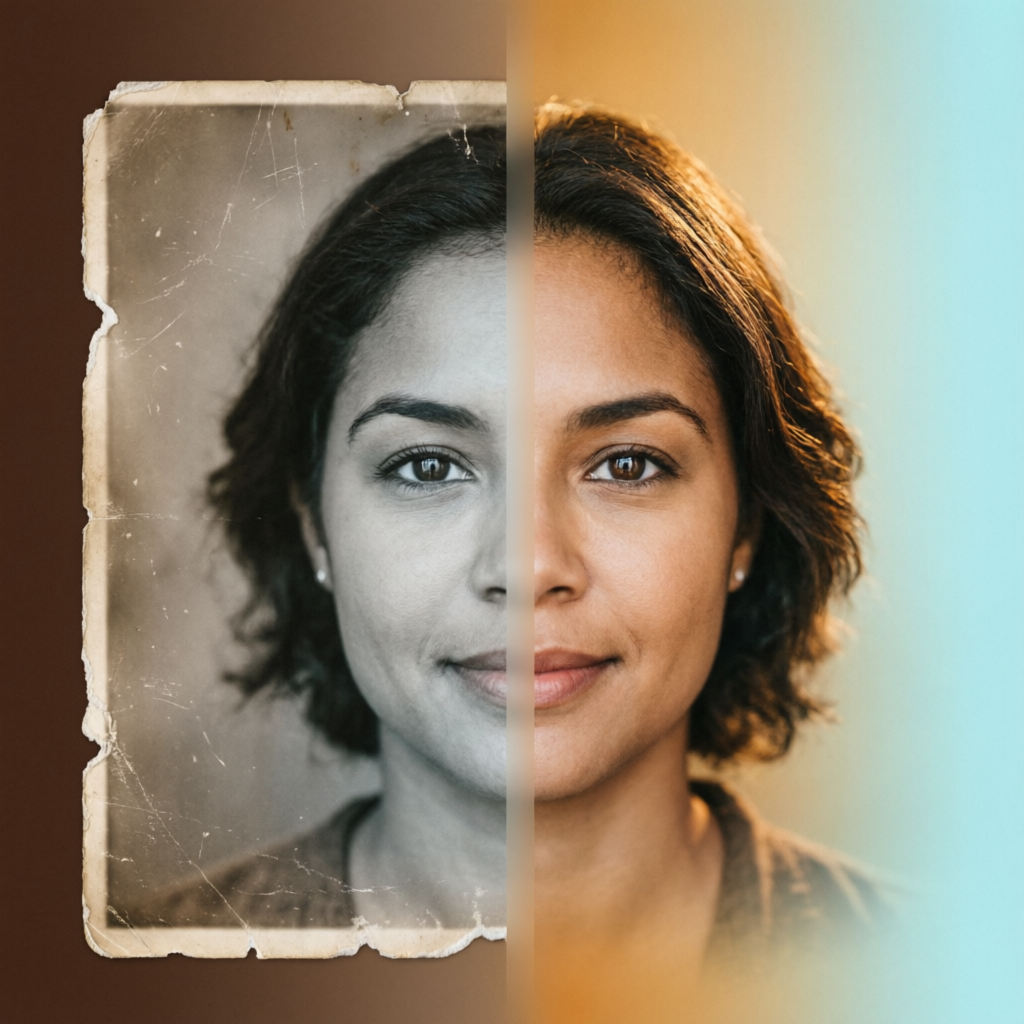
Photo restoration has evolved dramatically with AI technology. What once required hours of manual Photoshop work can now be achieved in seconds with AI-powered tools. Whether you're restoring precious family photos or working on professional restoration projects, understanding modern AI techniques is essential.
This comprehensive guide covers everything from basic AI restoration to advanced techniques, helping you choose the right approach for different types of photo damage. We'll explore automatic solutions, manual methods, and hybrid approaches that deliver professional results.
Understanding Photo Damage Types
Before diving into restoration techniques, it's crucial to identify the type of damage you're dealing with:
Physical Damage
- Scratches and Tears: Linear damage from physical handling or poor storage
- Fading: Color loss due to light exposure over time
- Stains: Water damage, chemical exposure, or contact with other materials
- Creases: Fold marks and bent areas
- Missing Sections: Torn or deteriorated portions
Digital Damage
- Low Resolution: Insufficient pixel density for modern displays
- Compression Artifacts: Quality loss from heavy JPEG compression
- Noise: Digital grain from high ISO or poor scanning
- Color Cast: Inaccurate color reproduction from aging prints or scanning issues
Age-Related Damage
- Yellowing: Paper oxidation causing warm color shifts
- Brittleness: Physical deterioration making scanning difficult
- Mold and Mildew: Biological damage leaving spots and patterns
Understanding your specific damage type helps you select the most effective restoration technique.
Automatic AI Restoration: Quick Solutions
Modern AI restoration tools use machine learning models trained on millions of photo pairs to automatically fix common damage.
Best Automatic Restoration Tools
1. MyHeritage Photo Enhancer
- Specializes in facial restoration
- Excellent for colorizing black and white photos
- Automatic scratch and tear removal
- Best for: Family photos and portraits
2. Adobe Photoshop Neural Filters
- Integrated into existing Photoshop workflow
- Multiple AI filters for different damage types
- JPEG artifact removal
- Best for: Professional workflows requiring further editing
3. Remini
- Mobile-first solution with desktop version
- Exceptional detail enhancement
- Face-focused restoration
- Best for: Quick mobile restoration
4. VanceAI Photo Restorer
- Batch processing capabilities
- Handles multiple damage types simultaneously
- API available for automation
- Best for: Large-scale restoration projects
When to Use Automatic Restoration
Automatic AI restoration works best when:
- Damage is evenly distributed (overall fading, noise)
- You need fast results for many photos
- Damage follows common patterns AI models recognize
- The photo has clear facial features (models are optimized for faces)
Limitations of Automatic Tools
Be aware of these constraints:
- Struggles with unique or severe damage
- May create artificial-looking details
- Limited control over specific areas
- Can introduce unwanted smoothing or sharpening
Manual AI-Assisted Techniques
For complex damage or when you need precise control, manual techniques with AI assistance deliver superior results.
Content-Aware Fill and Patch
Adobe Photoshop's Content-Aware technology uses AI to intelligently fill damaged areas:
Step-by-Step Process:
- Select the Damage: Use the Lasso Tool to outline damaged regions
- Apply Content-Aware Fill: Edit menu, Fill, select "Content-Aware"
- Review Results: AI analyzes surrounding pixels to generate fill content
- Refine if Needed: Multiple passes for complex damage
Best Practices:
- Make multiple small selections rather than one large selection
- Ensure adequate "good" pixels surround the damaged area (at least 2-3x the damaged region)
- Use on a separate layer for non-destructive editing
- Combine with manual cloning for best results
Clone Stamp with AI Sampling
Modern clone stamp tools incorporate AI to improve pattern matching:
Technique:
- Sample from undamaged areas with similar texture and lighting
- Use soft brush edges for seamless blending
- Vary source points frequently to avoid repetitive patterns
- Work in multiple passes with reduced opacity (30-50%)
Advanced Tip: Use the "Aligned" option for continuous patterns, disable it for spot repairs.
Frequency Separation with AI Sharpening
This technique separates color/tone from texture, allowing targeted restoration:
Process:
- Duplicate the photo into two layers
- Apply Gaussian Blur to the low-frequency layer (color and tone)
- Apply High Pass filter to high-frequency layer (texture details)
- Use AI sharpening tools on the high-frequency layer
- Fix color issues on the low-frequency layer independently
Benefits:
- Restore detail without amplifying color damage
- Fix color shifts without destroying texture
- Combine manual and AI approaches effectively
Hybrid Approach: Best of Both Worlds
Professional restoration often combines automatic AI with manual techniques:
Recommended Workflow
Phase 1: Preparation
- Scan or photograph at highest quality (minimum 600 DPI for prints)
- Create backup copies
- Assess damage and plan approach
- Correct major distortions (rotation, perspective)
Phase 2: Initial AI Processing
- Run automatic restoration for overall improvement
- Use AI upscaling if resolution is insufficient
- Apply AI noise reduction
- Initial color correction with AI tools
Phase 3: Manual Refinement
- Fix areas where AI failed or created artifacts
- Remove remaining scratches and stains with clone stamp
- Restore missing sections with content-aware fill
- Fine-tune color and tone balance
Phase 4: Detail Enhancement
- Selective sharpening on important features (faces, text)
- Subtle contrast enhancement
- Final color grading for period-appropriate look
- Add subtle film grain if needed for authenticity
Phase 5: Final Review
- View at 100% zoom and check all areas
- Compare with original to ensure improvements
- Get feedback if working for clients
- Export in appropriate format (TIFF for archival, JPEG for sharing)
Time Investment Guide
Expect these timeframes for typical photos:
- Simple damage, automatic only: 2-5 minutes
- Moderate damage, hybrid approach: 15-30 minutes
- Severe damage, mostly manual: 1-3 hours
- Extreme damage with missing sections: 3+ hours
Advanced Techniques for Specific Challenges
Colorizing Black and White Photos
AI Approach:
- Use dedicated colorization AI (DeOldify, MyHeritage)
- Provides automatic historically-accurate colors
- Fast results for most photos
Manual Refinement:
- Create color layer above photo
- Set blend mode to Color or Overlay
- Paint colors on separate layer for control
- Reference period color photography for accuracy
- Pay attention to skin tones (avoid oversaturation)
Restoring Faded Color Photos
Three-Stage Process:
- Levels Adjustment: Restore tonal range by setting black and white points
- Saturation Recovery: Selectively boost faded colors (avoid oversaturation)
- AI Enhancement: Use AI to recover lost detail in shadows and highlights
Pro Tip: Work in LAB color mode for more natural color restoration without affecting luminosity.
Fixing Severe Scratches
Layered Approach:
- Use AI spot removal for minor scratches
- Content-Aware Fill for medium scratches across textured areas
- Manual cloning for scratches through faces or important details
- Healing Brush for final blending
Reconstructing Missing Sections
When parts of photos are torn or missing:
AI Solutions:
- DALL-E 2 or Stable Diffusion Inpainting for creative reconstruction
- Adobe Firefly for seamless extension
- Runway ML for complex missing sections
Manual Solutions:
- Mirror undamaged sections if photo is symmetrical
- Sample from similar photos of same person/location
- Use content-aware fill with extended sampling area
- Combine multiple source photos if available
Ethical Considerations: Always disclose when reconstructed sections are inferred rather than original. For historical documentation, clearly mark reconstructed areas.
Color Correction and Period-Appropriate Adjustments
Restored photos should look improved but authentic to their era.
Understanding Period Color Characteristics
1950s-1960s Kodachrome:
- Rich, saturated colors (especially reds and blues)
- Slightly warm overall tone
- Excellent shadow detail
1970s-1980s Print Film:
- Warmer tone with yellow/red shift
- Lower contrast than modern photos
- Softer color saturation
1990s-2000s Early Digital:
- Slightly cooler tone
- Higher contrast
- Sometimes oversaturated colors
Matching Period Aesthetics
- Research photos from the same era and film stock if known
- Adjust white balance to match period characteristics
- Apply appropriate color curves
- Add subtle film grain for authenticity
- Avoid over-sharpening (especially for pre-digital photos)
Quality Control and Common Mistakes
What to Avoid
Over-Processing:
- Excessive sharpening creating halos
- Unnatural smoothing destroying texture
- Oversaturated colors that look artificial
- Overuse of AI creating painted appearance
Inconsistent Fixes:
- Different noise levels in various areas
- Mismatched lighting or shadows in restored sections
- Color temperature shifts between repaired and original areas
Loss of Authenticity:
- Removing all signs of age (some wear can add character)
- Modernizing hair, clothing, or settings
- Changing facial features or expressions
Quality Checks
Before finalizing restoration:
- View at multiple zoom levels (25%, 50%, 100%, 200%)
- Check in grayscale to spot tonal inconsistencies
- Compare directly with original side-by-side
- Get fresh perspective after a break
- Request feedback from others
Tools Comparison and Recommendations
For Beginners
Best Choice: Remini or MyHeritage
- Automatic processing
- Minimal learning curve
- Good results for common damage
- Free tiers available
For Enthusiasts
Best Choice: Luminar AI or ON1 Photo RAW
- Balance of automatic AI and manual control
- One-time purchase (no subscription)
- Intuitive interface
- Good value for money
For Professionals
Best Choice: Adobe Photoshop with Neural Filters
- Maximum control and flexibility
- Integration with professional workflow
- Advanced manual tools when AI fails
- Industry standard for client work
For Large-Scale Projects
Best Choice: VanceAI or Anthropics
- Batch processing capabilities
- API integration options
- Consistent results across many images
- Cost-effective for volume work
Preservation After Restoration
Once restored, protect your work:
Digital Preservation
- Save master files in uncompressed TIFF format
- Use JPEG only for sharing and web use
- Maintain multiple backups (3-2-1 rule: 3 copies, 2 different media, 1 offsite)
- Include metadata documenting restoration work done
- Consider cloud storage for redundancy
Print Quality
If printing restored photos:
- Use archival-quality paper and inks
- Frame with UV-protective glass
- Store in climate-controlled environment
- Keep away from direct sunlight
- Use acid-free matting and backing
Future of AI Photo Restoration
Emerging technologies to watch:
Generative AI Improvements:
- Better understanding of context for missing sections
- More accurate colorization with historical knowledge
- Improved detail synthesis that looks natural
Real-Time Processing:
- Instant restoration as you scan
- Live preview of restoration options
- Faster processing for video frame restoration
Specialized Models:
- AI trained on specific eras and film stocks
- Portrait-specific models for better facial restoration
- Document and text-focused restoration models
Getting Started: Your First Restoration Project
Ready to begin? Follow this starter workflow:
Step 1: Choose a Simple Photo
Start with moderate damage (some fading, a few scratches) rather than severe damage.
Step 2: Scan or Photograph
Use the highest quality you can achieve (at least 600 DPI for scanning).
Step 3: Try Automatic Restoration
Use a tool like Remini or MyHeritage to see what automatic processing achieves.
Step 4: Assess Results
Identify areas that need manual attention.
Step 5: Learn One Manual Technique
Focus on mastering clone stamp or content-aware fill first.
Step 6: Refine Your Results
Apply your manual technique to improve the automatic results.
Step 7: Compare and Save
Keep both original and restored versions for reference.
Conclusion
AI has revolutionized photo restoration, making it accessible to everyone while still rewarding skill and expertise for challenging projects. The best approach combines automatic AI processing for efficiency with manual techniques for quality and control.
Start with automatic tools to understand what AI can achieve, then gradually incorporate manual techniques as you encounter their limitations. With practice, you'll develop an intuition for which approach works best for each type of damage.
Remember that restoration is part art, part science. Your goal is honoring the original photograph while making it viewable and enjoyable for future generations. Whether you're restoring family treasures or working professionally, these techniques will help you achieve beautiful, authentic results.
Related Articles:
- AI Image Upscaling & Enhancement: Complete Guide 2026
- AI Image Denoising and Sharpening: Complete Guide 2026
- AI Old Photo Restoration Guide
Recommended External Tools:
Ready to restore your precious photos?
Try AImage for Free →Ready to try it yourself?
Try AImage for Free →