AI Photo Editing for Online Dating Profiles: Complete Guide 2026
Transform your dating profile photos with AI tools. Learn how to create authentic, attractive profile pictures that get more matches while maintaining your natural appearance.
Your dating profile photo is your first impression—and often your only chance to spark interest. Research shows that profiles with high-quality photos receive 200-400% more matches than those with poorly lit or low-quality images. Yet most people struggle with finding the right balance: photos that are attractive and polished without looking fake or overly edited.
AI photo editing technology has revolutionized how singles present themselves on dating apps. Modern AI tools can enhance lighting, smooth skin texture, improve composition, and even suggest optimal cropping—all while maintaining authentic appearance. The key is using these tools strategically to showcase your best self without crossing into deception.
Whether you're on Tinder, Bumble, Hinge, or Match, this guide will show you how to use AI editing to create dating profile photos that are genuine, appealing, and algorithm-friendly. We'll cover everything from basic enhancement to advanced techniques, along with honest advice about ethical boundaries in photo editing for dating.
Why Your Dating Photos Matter More Than You Think
The Science of First Impressions
Dating app users make snap judgments in under 2 seconds. Studies from major dating platforms reveal harsh realities:
- 87% of users swipe based solely on profile photos before reading any bio text
- Professional-quality photos increase match rates by 40-60% across all demographics
- Poor lighting or blurry images reduce match probability by 70%
- Authentic-looking enhancement (natural skin texture, realistic lighting) outperforms heavily filtered photos by 35%
The dating app algorithm itself favors high-quality images. Tinder's ELO-based ranking system gives priority to profiles with clear, well-lit photos. Poor image quality literally reduces your visibility in the app.
Common Photo Mistakes That Kill Your Chances
Most dating profile photos fail for preventable reasons:
Lighting Problems: Dark, shadowy faces or harsh overhead lighting create unflattering shadows. Indoor fluorescent lighting adds yellow-green color casts that make skin look sickly.
Poor Composition: Photos cropped too tight or too distant. Cluttered backgrounds that distract from your face. Awkward camera angles that distort facial proportions.
Technical Issues: Low resolution images that appear pixelated. Compression artifacts from over-sharing. Blurry motion or out-of-focus subjects.
Over-Editing Red Flags: Overly smoothed skin that looks plastic. Unnatural skin tones. Obvious beauty filter effects. Backgrounds warped by face-tuning tools.
Inconsistent Presentation: Wildly different looks across photos—one from 5 years ago, one heavily filtered, one natural—creates trust issues and confusion about your actual appearance.
AI editing can fix most of these issues when applied thoughtfully.
Essential AI Tools for Dating Profile Enhancement
Comprehensive Comparison
Different AI tools serve different needs. Here's how leading options compare for dating profile enhancement:
Portrait Enhancement Focus:
Facetune AI (iOS/Android): Industry-leading portrait editing with natural-looking results. Offers precise control over skin smoothing, teeth whitening, and facial feature enhancement. Best for detailed face editing. Subscription: $7.99/month.
Remini (iOS/Android): Specializes in photo restoration and quality enhancement. Excellent for turning grainy or low-res photos into sharp, clear images. Particularly effective for older photos. One-time purchase: $4.99 or subscription $4.99/month.
FaceApp (iOS/Android): Advanced AI filters including age, gender, smile enhancement, and makeup application. Controversial for over-the-top transformations, but newer "Subtle" mode produces realistic results. Subscription: $9.99/month.
Lighting & Background Tools:
Relight AI (Web/iOS): Specialized in relighting portraits. Can change lighting direction, intensity, and color temperature as if you'd been photographed with professional lighting. Free with watermark, $12.99/month for full features.
Remove.bg (Web/iOS/Android): Best-in-class background removal. Useful for creating clean backgrounds or placing yourself in better settings. Free for low-res, $9/month for high-res unlimited.
Photoroom (iOS/Android): Combines background removal with AI-generated replacement backgrounds. Great for creating studio-quality portrait backdrops. Free tier available, Pro: $9.99/month.
Comprehensive All-in-One:
AImage (Web): Complete AI photo editing platform with portrait enhancement, background editing, lighting adjustment, and batch processing. Offers natural-looking enhancement specifically designed for social media and dating profiles. Free tier: 10 images/month, Pro: $14.99/month.
Lightroom with AI (Desktop/Mobile): Professional-grade editing with AI-powered auto-enhance. Steeper learning curve but maximum control. Subscription: $9.99/month (includes Photoshop).
Tool Selection Strategy
For Quick Enhancement (5 minutes per photo):
- Use Remini for quality/sharpness improvement
- Apply Facetune's "Natural" preset for subtle skin smoothing
- Adjust exposure/contrast with AImage's auto-enhance
For Maximum Impact (15-20 minutes per photo):
- Start with Remini for quality foundation
- Use Relight AI to fix lighting issues
- Apply targeted edits in Facetune (teeth, skin, eyes)
- Remove distracting backgrounds with Photoroom
- Final color grading in Lightroom Mobile
For Budget-Conscious Users:
- Free tier of AImage (10 photos covers most dating profiles)
- One-time Remini purchase ($4.99)
- iOS/Android native photo editor for basic adjustments
Step-by-Step: Creating Your Perfect Dating Profile Photo
Phase 1: Start With Good Source Material
AI editing cannot save fundamentally bad photos. Before editing, ensure your source images meet these criteria:
Camera Requirements:
- Use the rear camera, not front-facing (better lens quality)
- Shoot in the highest resolution available
- Enable HDR mode for outdoor shots
- Use portrait mode if available (natural background blur)
Lighting Checklist:
- Natural light from windows (soft, flattering)
- Avoid direct overhead lights (create unflattering shadows)
- Golden hour outdoor lighting (1 hour before sunset)
- Face the light source, not away from it
Composition Basics:
- Keep head and shoulders centered in frame
- Leave breathing room above your head
- Ensure background is relatively clean and uncluttered
- Use the rule of thirds: align your eyes along the top third line
Expression & Authenticity:
- Genuine smile (engage eye muscles, not just mouth)
- Make eye contact with the camera
- Relax your shoulders and posture
- Take 20-30 shots to capture natural expressions
Phase 2: Quality Enhancement (Foundation Layer)
Begin with technical improvements that don't alter your appearance:
1. Resolution & Clarity Boost
Open your photo in Remini:
- Upload the image
- Select "Enhance" mode
- Let AI process (20-30 seconds)
- Download high-resolution result
This step sharpens details, reduces noise, and improves overall image quality without changing your actual appearance.
2. Color & Exposure Correction
Use AImage or Lightroom Mobile:
- Apply auto-enhance for initial correction
- Adjust exposure to brighten if too dark (typically +0.3 to +0.7)
- Increase shadows slider to reveal detail in dark areas
- Reduce highlights if blown-out bright spots exist
- Adjust white balance to remove color casts (skin should look neutral, not orange or yellow)
3. Sharpness & Clarity
Fine-tune sharpness (be conservative):
- Increase clarity by +10 to +20 (enhances mid-tone contrast)
- Add texture +10 to +15 (brings out details without over-sharpening)
- Avoid increasing overall sharpness beyond +20 (creates harsh appearance)
Phase 3: Portrait Enhancement (Subtle & Natural)
Now apply AI-powered appearance improvements with restraint:
1. Skin Smoothing (The Right Way)
Open Facetune and apply conservative smoothing:
- Use "Smooth" tool at 30-40% intensity (not 100%)
- Focus on evening out skin texture, not erasing it completely
- Preserve visible pores and natural skin texture
- Leave laugh lines and character features intact
- Avoid smoothing so much that skin looks plastic or waxy
Critical Rule: If someone couldn't recognize you in person after seeing your edited photo, you've gone too far.
2. Blemish Removal
Remove temporary imperfections only:
- ✅ DO remove: Active breakouts, red spots, stray hairs, food particles
- ❌ DON'T remove: Moles, beauty marks, scars, birthmarks (permanent features)
- Use healing brush or spot remover at 80-90% opacity
- Blend edges so removal looks seamless
3. Teeth Whitening
Brighten smile without creating unrealistic "Hollywood white":
- Use Facetune "Whiten" tool at 20-30% strength
- Avoid pure white teeth (looks fake)
- Target natural whitening: reduce yellowing, not eliminate all color
- Preserve shadow detail between teeth
4. Eye Enhancement
Make eyes pop without looking artificial:
- Increase brightness in iris area (+5 to +10 exposure)
- Add slight sharpness to bring out detail
- Consider subtle increase in saturation to intensify eye color (don't change color completely)
- Reduce redness in eye whites if present (use healing brush on red veins)
- Add subtle catch light reflection if missing (tiny bright spot in iris)
Phase 4: Lighting Refinement
Proper lighting transforms good photos into great ones:
Using Relight AI:
- Upload your enhanced photo
- Select lighting preset closest to desired mood ("Soft Natural" for general use, "Golden Hour" for warm glow)
- Adjust lighting direction (typically 45° from front for flattering shadows)
- Reduce lighting intensity if effect looks too dramatic (60-75% is usually optimal)
- Ensure shadows still look natural (not too dark or completely eliminated)
Manual Lighting Adjustment (if not using Relight AI):
In AImage or Lightroom:
- Use graduated filter to brighten face area
- Apply radial filter around face to add subtle vignette (draws attention to you)
- Increase vibrance +10 to +15 (enhances color without over-saturation)
- Warm color temperature slightly (+50 to +150 Kelvin for friendly, approachable feel)
Phase 5: Background Optimization
Clean or enhance background without creating obvious edits:
Option A: Background Blur (Subtle)
If background is slightly distracting:
- Use AImage's depth blur feature
- Apply gentle blur (not maximum)
- Ensure blur looks natural (similar to camera portrait mode)
- Avoid hard edge artifacts around hair
Option B: Background Replacement (Bold)
For cluttered or unflattering backgrounds:
- Use Photoroom or Remove.bg to extract subject
- Select clean, appropriate replacement background (neutral colors, simple patterns, outdoor scenes)
- Ensure lighting on you matches background lighting direction
- Blend edges carefully (especially hair) so extraction looks seamless
- Add subtle shadow beneath you for grounded appearance
Critical Warning: Mismatched lighting between subject and background screams "fake." If you can't match lighting perfectly, stick with background blur instead.
Phase 6: Final Polish & Export
Complete the process with finishing touches:
Crop & Composition:
- Follow dating app guidelines (usually square 1:1 or 4:5 ratio)
- Position your eyes approximately one-third down from top
- Ensure adequate headroom (space above head)
- Crop out distracting elements at edges
Final Adjustments:
- Review overall saturation (dial back if colors look too intense)
- Check that edits look consistent across different devices/screens
- Ensure file size meets app requirements (usually under 5MB)
Export Settings:
- Format: JPEG
- Quality: 90-95% (high quality without massive file size)
- Resolution: Minimum 1000px on shortest side (most dating apps accept up to 6MB files)
- Color profile: sRGB (ensures consistent color across devices)
Dating-Specific AI Enhancement Strategies
What to Enhance (And What to Avoid)
Safe Enhancements (universally accepted):
- Improving lighting and exposure
- Removing temporary blemishes
- Mild skin texture smoothing
- Teeth whitening (natural-looking)
- Background cleanup or blur
- Color correction
- Sharpness and clarity
- Eye brightness
Risky Enhancements (use with extreme caution):
- Face reshaping (jawline, nose, cheeks)
- Body reshaping or slimming
- Adding makeup via AI
- Changing hair color or style
- Significant wrinkle removal
- Dramatic skin tone changes
Never Acceptable:
- Using someone else's photo
- AI face-swapping onto different bodies
- Age transformation (making yourself look significantly younger)
- Adding height via perspective tricks
- Completely changing facial features
- Using AI-generated faces
App-Specific Optimization
Different dating platforms have different photo cultures:
Tinder:
- First photo should be clear face shot (not full-body)
- Bright, vibrant colors perform well
- Outdoor photos with good lighting get more swipes
- Avoid overly filtered looks (algorithm may deprioritize heavily edited photos)
Bumble:
- Requires face in all photos (enforced by AI)
- Natural, candid-looking photos perform best
- Smile photos outperform serious expressions
- Profile verification feature means consistency matters
Hinge:
- Multiple photos required—ensure consistent look across all
- Prompts and photos work together (consider overall story)
- More emphasis on authenticity than glamour
- Users scrutinize photos more carefully (higher-quality matches, more detailed profiles)
Match/eHarmony (over 30 demographic):
- Professional-looking photos preferred
- Subtle enhancement outperforms obvious filters
- Clear, well-lit photos essential
- Avoid trendy filters or effects that look dated
The 3-Photo Strategy
Most dating profiles benefit from three carefully edited photo types:
Photo 1: The Hook (Primary profile photo)
- Clear face shot, direct eye contact
- Genuine smile
- Professional-quality lighting
- Clean background
- This gets the most AI enhancement effort
Photo 2: The Context (Full-body or activity shot)
- Shows your interests/hobbies
- Demonstrates your physical presence
- Less face-focused editing, more environment enhancement
- Candid feel (even if posed)
Photo 3: The Personality (Character shot)
- Laughing, mid-conversation, doing something you love
- Minimal editing—focus on authentic moment
- Shows your personality beyond appearance
Ethical Boundaries: Enhancing vs. Deceiving
The First Date Test
Here's the ultimate guideline: If your date wouldn't recognize you based on your photos, you've edited too much.
Dating app photos should represent how you actually look on a good day with flattering lighting—not a fantasy version of yourself. Research shows that deceptive photos lead to:
- 73% higher first-date rejection/disappointment rates
- Lower likelihood of second dates
- Negative reviews on apps with feedback systems
- Wasted time for both parties
Where to Draw the Line
Acceptable: Showing your best self under optimal conditions
- Think of it as "good lighting + professional photographer" level
- Removing temporary imperfections
- Compensating for poor camera/lighting quality
- Presenting the "you on your best day"
Deceptive: Changing fundamental aspects of appearance
- Significantly altering facial structure
- Hiding permanent features
- Creating unrealistic body proportions
- Using photos that don't reflect current appearance
Gray Area: Features that change naturally
- Weight fluctuations (use recent photos only)
- Hair length/style changes (update photos regularly)
- Facial hair presence (include recent variation)
- Age-related changes (update photos at least annually)
How Others See Your Edits
Most people can detect over-editing, even if they can't articulate what looks wrong. AI-generated or heavily manipulated photos trigger subtle uncanny valley responses:
- Skin too smooth (lacks natural texture)
- Eyes too bright or unrealistic color
- Warped backgrounds near face/body edges
- Inconsistent lighting across image
- Unnatural shadows or missing shadows
- Overly symmetrical faces
The Honesty Advantage
Authentic photos with subtle enhancement actually perform better than heavily edited ones:
Research from Hinge (2025 data):
- Profiles with "authentic-looking" photos received 40% more likes
- Unfiltered or minimally edited photos led to 60% more conversation starts
- Users specifically complained about "Instagram filter looks" in surveys
The dating meta has shifted toward authenticity. Gen Z and younger Millennial users actively avoid profiles that look overly curated or filtered.
Advanced Techniques for Specific Scenarios
Low-Light Photo Rescue
Indoor or evening photos often suffer from poor lighting. AI can salvage these:
Using Remini's Night Enhancement:
- Upload low-light photo
- Select "Night Mode" enhancement
- AI brightens image while reducing noise
- Manually adjust exposure if still too dark (+0.5 to +1.0)
Multi-Stage Approach:
- Use Remini to denoise and sharpen
- Apply Relight AI to add virtual lighting
- Adjust shadows and highlights in AImage
- Add subtle warmth to color temperature
Group Photo Optimization
If using group photos (showing social life):
Enhancement Strategy:
- Don't edit yourself more than others (creates obvious disparity)
- Apply uniform lighting/color correction to entire image
- Use subtle background blur to make everyone stand out
- Crop or blur faces of others if they didn't consent to being on dating apps
Alternative: Use background blur heavily so others are barely recognizable while you remain in focus.
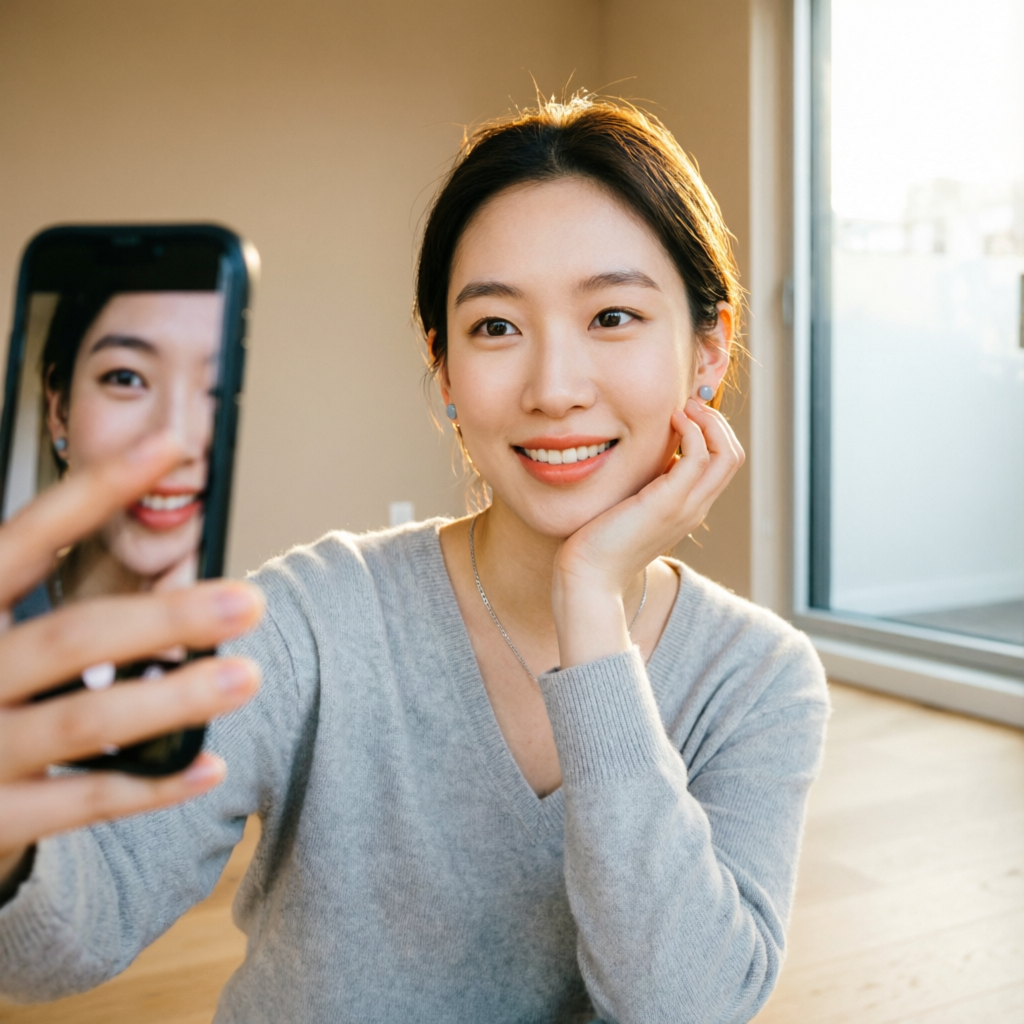
Selfie Enhancement Workflow
Front-camera selfies need extra care due to lens distortion:
Correcting Selfie Distortion:
- Use portrait mode to reduce wide-angle effect
- Facetune's "Face" tool can subtly correct proportion distortion
- Increase distance from camera before cropping (reduces distortion)
- Consider flipping image (people prefer their "mirror image" self)
Lighting Challenges:
- Use Relight AI to simulate front-facing light
- Brighten face area with graduated filter
- Reduce shadows under nose/chin with healing brush
Professional Photo Enhancement
If you've invested in professional dating photos:
Subtle Refinement Only:
- Professional photos need minimal AI editing
- Focus on consistency with your other photos
- Possibly tone down professional retouching if it looks too polished
- Ensure color grading matches your other images
Creating a Consistent Photo Set
The Cohesion Challenge
Your dating profile photos should look like they're of the same person (obviously), but you'd be surprised how often this fails:
Common Consistency Mistakes:
- One photo heavily filtered, others not
- Different apparent ages across photos
- Wildly different lighting/color treatments
- Different apparent body types
Establishing Visual Consistency
Color Grading Uniformity:
- Edit all photos with similar color treatment
- Use the same warmth/coolness across images
- Match contrast levels
- Apply similar vibrance/saturation
In AImage or Lightroom:
- Edit your primary photo first
- Copy settings
- Paste settings to other photos as starting point
- Adjust individual images but maintain overall look
Enhancement Consistency:
- If you whitened teeth in one photo, apply similar whitening to others
- Use same skin smoothing level across all photos
- Match eye enhancement intensity
The Timeline Rule
Keep your photo set current:
- ✅ Ideal: All photos from last 6 months
- ⚠️ Acceptable: Photos from last 12 months
- ❌ Problematic: Any photo over 2 years old
Update your profile photos at least twice per year, or immediately after significant appearance changes (haircut, weight loss/gain, facial hair, etc.).
Tools & Resources
Recommended AI Editing Stack
Essential (covers 90% of needs):
- Remini ($4.99 one-time): Quality enhancement
- AImage (Free tier): Comprehensive editing
- Native phone editor: Basic adjustments
Enhanced (for power users):
- Add Facetune ($7.99/month): Advanced portrait work
- Add Relight AI ($12.99/month): Lighting control
Professional (maximum quality):
- Add Lightroom ($9.99/month): Complete control
- Add Photoroom ($9.99/month): Background management
Learning Resources
YouTube Tutorials:
- "Natural Dating Profile Photo Editing" by Peter McKinnon
- "AI Portrait Enhancement Tutorial" by Manny Ortiz
- "Dating App Photo Tips from Photographers" by Jessica Kobeissi
Articles & Guides:
- Hinge's official "Photo Tips for Better Matches"
- Bumble's "Authenticity in Profile Photos" guide
- Modern Love podcast episode: "The Truth About Dating Photos"
Community Feedback
Before finalizing your photos, get honest opinions:
Reddit Communities:
- r/Tinder (brutally honest feedback)
- r/hingeapp (constructive photo critiques)
- r/DatingApps (general advice)
Friends & Family:
- Ask 3-5 people which photos look most like you
- Get feedback on whether edits are noticeable
- Test different photos to see which get best reactions
Common Mistakes to Avoid
Over-Editing Red Flags
The Plastic Skin Look:
- Caused by: Skin smoothing set above 50%
- Solution: Reduce smoothing, preserve texture, zoom in to check for wax-like appearance
The Uncanny Valley Face:
- Caused by: Excessive face reshaping or symmetry tools
- Solution: Use face tools at maximum 30% intensity, never reshape bone structure
Warped Backgrounds:
- Caused by: Body reshaping tools that distort surroundings
- Solution: Avoid body editing tools entirely, or use on solid-color backgrounds only
Mismatched Lighting:
- Caused by: Replacing backgrounds without matching light direction
- Solution: Use Relight AI to align subject lighting with new background, or stick with background blur
Technical Errors
Over-Sharpening:
- Creates harsh "crunchy" texture
- Solution: Sharpen at maximum +20, check at 100% zoom
Over-Saturation:
- Makes colors look artificial and "punchy"
- Solution: Keep vibrance under +20, saturation under +10
Compression Artifacts:
- Occurs from saving at low quality repeatedly
- Solution: Always edit from original file, export at 90%+ quality
Wrong Aspect Ratio:
- Dating apps crop photos differently
- Solution: Export square (1:1) versions for Tinder, 4:5 for Instagram-style apps
Strategic Errors
Inconsistent Editing Across Photos:
- Creates suspicion about authenticity
- Solution: Edit all photos in same session with consistent approach
Using AI-Generated Backgrounds:
- Often look obviously fake
- Solution: Use simple blur or real backgrounds from different photos
Copying Celebrity/Influencer Edit Styles:
- Looks try-hard and inauthentic for dating
- Solution: Go for natural enhancement, not Instagram-influencer aesthetic
Measuring Your Success
A/B Testing Your Photos
Dating apps allow photo reordering—use this to test:
Methodology:
- Use current photo set for one week, track matches/likes
- Swap in newly edited versions
- Monitor performance for one week
- Compare metrics
Key Metrics:
- Match rate (matches per right swipes)
- Like rate (incoming likes)
- Conversation start rate (how many matches message first)
- Response rate (how many reply to your first message)
Typical Improvements from Good AI Editing:
- 30-50% increase in match rate
- 40-60% increase in incoming likes
- 15-25% increase in conversation starts
Long-Term Profile Optimization
Monthly Review:
- Check which photos get most engagement (many apps show this)
- Remove underperforming photos
- Add new photos regularly (keep profile fresh)
Quarterly Updates:
- Take new photos with latest appearance
- Re-edit old favorites with improved technique
- Ensure consistency across updated photo set
Annual Overhaul:
- Complete photo refresh
- Update editing approach based on what's performed best
- Invest in one professional photo session, enhance with AI
The Future of AI in Dating Profile Photos
Emerging Technologies (2026 and Beyond)
AI Detection in Dating Apps: Tinder and Bumble are testing AI systems that detect heavily edited photos and may flag or deprioritize them. Early tests show:
- Overly smoothed skin triggers detection
- Obvious background manipulation gets flagged
- Excessive face reshaping alerts reviewers
This means: The window for heavy editing is closing. Natural enhancement will remain acceptable and even necessary, but obvious manipulation may hurt your profile performance.
AI-Powered Photo Coaching: New tools like Hinge's "Photo Lab" use AI to:
- Analyze your current photos
- Suggest which to keep, remove, or replace
- Recommend editing improvements
- Predict which photos will perform best
3D Avatar Profiles: Some apps are experimenting with verified 3D avatars created from multiple angles of your face:
- Combines multiple photos into 3D representation
- Shows you from different angles
- Harder to deceive with editing
- Still allows flattering lighting/angles
Preparing for the Authentic Future
As AI detection improves, focus on:
Building Genuine Confidence: The best "edit" is feeling good about your actual appearance. AI tools should enhance photos of the real you, not create a different person.
Photography Skill Over Editing: Invest time learning better angles, lighting, and poses rather than relying on heavy post-processing.
Regular Updates: Keep photos current so edits remain subtle corrections rather than major transformations.
Conclusion: Enhancement, Not Deception
AI photo editing for dating profiles walks a fine line between showing your best self and misrepresenting your appearance. The technology enables everyone to have "professional photographer quality" photos without the expense—but with that power comes responsibility.
Key Principles to Remember:
-
Edit for quality, not transformation: Fix lighting, remove temporary blemishes, and polish your photos—but don't change fundamental aspects of your appearance.
-
The First Date Test: If your date would be surprised by your actual appearance, you've edited too much.
-
Consistency is credibility: Maintain similar enhancement levels across all photos. Mismatched editing raises red flags.
-
Natural beats perfect: Research shows authentic-looking photos outperform obviously filtered ones. Subtle enhancement works better than dramatic transformation.
-
Update regularly: Keep your photos current. A great edited photo from two years ago is worse than a recent, minimally edited photo.
The goal isn't to create an idealized version of yourself—it's to present the real you under optimal conditions. Think of AI editing as the difference between a passport photo and a professional portrait, not the difference between reality and fantasy.
Used thoughtfully, AI editing tools level the playing field for those without photography skills or professional equipment. They help you overcome technical limitations and present yourself in the best light—literally and figuratively. But they cannot and should not create a different person.
Your dating profile should promise what you can deliver: the genuine person sitting across from your date on that first meeting. AI editing helps ensure your photos do you justice without writing checks your appearance can't cash.
Related Articles:
- Creating Professional Portrait Photos with AI Enhancement
- AI Background Removal for Perfect Profile Pictures
- Lighting Techniques Every Portrait Photographer Should Know
Recommended External Tools:
- Facetune AI - Professional portrait editing
- Remini - Photo quality enhancement
- Photoroom - Background editing and removal
Ready to transform your dating profile photos?
Try AImage for Free →Ready to try it yourself?
Try AImage for Free →